The “Be Bold Color Block” CONGRATS die set from Spellbinders comes with a very large CONGRATS die and also a smaller Yay!. I love all the “Be Bold Color Block” die sets …. there’s a Happy Birthday, Hello, Love You, Merry Christmas and Thank You. This collection of dies makes some really cute and easy cards. This Congrats die set could be used for so many different occasions … like a new baby, a wedding, a new job, a graduation, etc. So many awesome choices … but I decided to go with a graduation themed card.
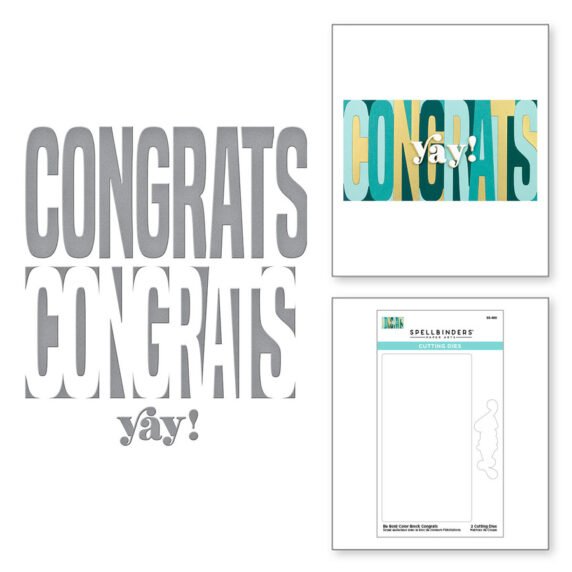
I started out by using pattern papers from the DCWV Graduation 12×12 Paper Pad. I picked out 5 papers … 1 for the background and then 4 to use for the CONGRATS letters. I also used some gold mirror card to cut out the “yay!”. This card was very easy to create and put together. What took the most time was creating some faux chipboard with all the letters. You could skip creating the faux chipboard and just use a single layer, but I love the added dimension it gives to the card and makes the card so chunky. I cut out the words 3 times with black cardstock and then I cut out the words once with the patterned paper and mirror card. I used some Bearly Art liquid glue and glued the three black letters one on top of the other and then added the patterned paper on the very top.
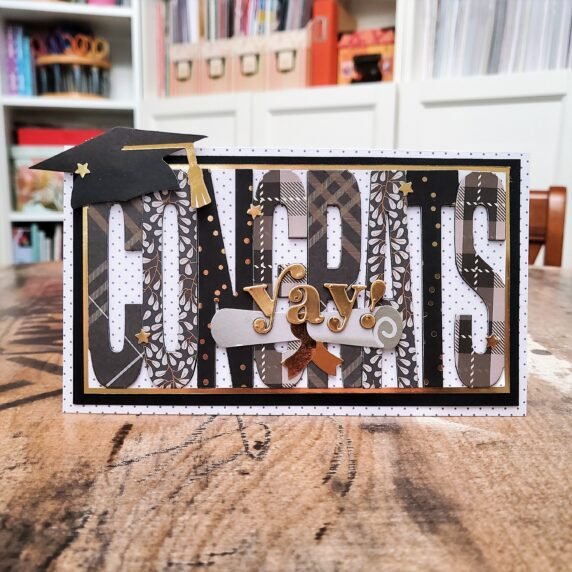
It was really easy to line up the letters because each letter has an edge and butts up against the next letter. I glued all the letters to some white & black polka dot paper. After that was put together, I matted the card front with gold mirror card, then some more of the white & black polka dot paper and then glued that to the white card base leaving a 1/8″ border between each card layer. All of the layers really added so much to this card and my card ended up being 7″ x 4″.
I also had some ephemera from DCWV graduation and I picked out some smaller die cuts not really sure what I was going to use but didn’t want any thing too large. I found a diploma that I added to the center bottom and also a gradation cap that I added to the top left corner. I thought the hat looked super cute … almost like the card was wearing a hat … lol!
I added I then added the yay just above the diploma and then to add some finishing touches to make the card sparkle even more, I used a star punch from Fun Stampers Journey and created some tiny gold stars using the mirror card and scattered a few of those across the front of the card.
Here are some closeups.


And, here’s a full picture of the card.
I hope I’ve given you some inspiration for how you can use the new Congrats die from the Spellbinders Be Bold Color Block Collection to create a super cute and awesome card to help celebrate someone’s special event.
@teamspellbinders #Spellbinders #neverstopmakings #amazingpapergrace_creates